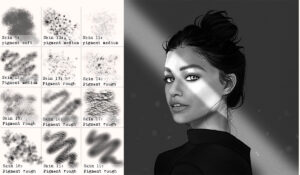
Sooner or later we all use them: blend modes. But, how do they work? What are they even used for?
A blend mode is a specific setting you can add to a Procreate layer. A layer with a blend mode is no longer a normal layer. Its purpose is now to affect the layers below it. Anything you paint on this layer will result in a different effect depending on the blend mode.
Keep reading to Procreate blend modes explained
Where to find blend modes in Procreate
You find blend modes in Procreate on each individual layer. First, select the layers panel, then select a layer. Next, tap ”N”. Now you can scroll through all of Procreate’s blend modes. Above the blend modes is where you find the opacity slider.
By default, each layer is set to N which stands for normal.

Procreate blend modes explained
Blend modes are available in drawing software such as Procreate, Autodesk Sketchbook, and Photoshop to name a few. They even are available in video editing programs like Adobe Premier.
Blend modes all work in the same way. But for now, let’s talk specifically about Procreate.
In Procreate blend modes work with 3 components:
- The base layer
- This is the layer directly below a blend layer
- This layer gets affected by the blend mode
- The blend layer
- This is the layer on which we choose the blend mode
- This layer goes directly on top of the base layer
- The opacity slider
- We use the opacity slider of the blend layer to increase or decrease the effectiveness of the blend mode
For example, we have a layer on which we’ve painted a flower. But now we want to add light. We can use a blend mode to get a quick and fun light effect.
To do this we would:
- Create a new layer on top of our base layer (your base layer is your flower layer)
- This newly created layer is now your blend layer
- Paint on your blend layer where you want the light to shine on the flower
- Set the blend mode of your blend layer to ”Add”
- Lower the opacity
- Play around until you find something that you like
The blend mode Add is not specifically for light situations, but it does fit the occasion. Artists often go through each blend mode to see what works in their specific situation.
How do blend modes work in Procreate
Blend modes work by using specific behind-the-scene mathematics. If we set a layer to a certain blend mode, that specific blend mode either adds, subtracts, blends, or multiplies pixels from one layer to another. There are 25 Procreate blend modes to choose from.
One of the most popular blend modes is Multiply. This blend mode is used to create shadows.

What are the 6 categories of blend modes?
The six categories of blend modes are:
- Darken
- Lighten
- Contrast
- Inversion
- Cancellation
- Component

Blend modes affect every pixel below the blend layer.
So If your base layer only contains a subject and not a background the blend layer will also affect the background even though the background is on a different layer.
If you only want to affect the baselayer you should set your blend layer to clip.
To clip your blend mode to your base layer you:
- Select your blend layer
- Tap the blend layer again
- Tap on Clipping Mask
What does each blend mode do in Procreate?
As you now know, blend modes need a base layer, a blend layer, and its opacity. To make things clear I recommend you read this article: hue, value and saturation explained. It makes working with some blend modes easier to understand.
Let’s go through each blend mode and see what they do. Each blend mode in the examples is set to 100% opacity. Lowering the opacity gives you less intense results!
Multiply blend mode explained
The multiply blend mode:
- Darkens
- It multiplies the values of the base to the blend layer
- The base layer will come out darker
- Is popular to use for creating shadows
In the example below you see that only the values are affected because the blend layer’s colors don’t have a hue (they’re gray).

The multiply blend mode is the first one to fall in the darken category.
Darken blend mode explained
The darken blend mode:
- This blend mode compares both the base and blend layer and keeps the darker of the two
- In the example below you see that the yellow on the blend layer does nothing to the yellow of the base layer: they are equal so nothing happens

Color burn blend mode explained
- Increases the contrast between the base and blend layer
- Darkens everything except 100% black and 100% white
- Mid-tones will be more saturated and the highlights will be muted
As you can see in the example below black and white is being left alone.

Linear Burn blend mode explained
- Is the exact same as Color Burn except it does affect white
- It’s darker than Multiply but less saturated than Color Burn

Darker Color blend mode explained
- Similar to Darken but on steroids (more intense)
- Instead of using each RGB channel, it takes a composite

Normal
This blend mode is the default. Nothing happens here.
Lighten blend mode explained
- The opposite of Darken
- Compares and keeps the brightest of the two

Screen blend mode explained
- Great for highlights and brightening certain parts
- Opposite of Multiply
- Shows everything that is white and hides black

Colour Dodge blend mode explained
- Saturates mid-tones and blows out highlights
- Opposite of Color Dodge

Add blend mode explained
- Increases brightness
- Great for strong light casts

Lighter Color blend mode explained
- Similar to Lighten but it takes a composite of all RGB channels

Overlay blend mode explained
- Another popular blend mode
- A combination of Screen and Multiply: it lightens and darkens the mid-tones

Soft Light blend mode explained
- Similar to Overlay but softer

Hard Light blend mode explained
- Combination of Multiply and Screen
- Very intense result

Vivid Light blend mode explained
- Anything darker than 50% value is darkened and anything lighter than 50% is lightened
- Best used with a lowered opacity

Linear Light blend mode explained
- Dodges and burns (lightens lights and darkens darks)
- Best used with lower opacity

Pin Light blend mode explained
- Removes mid-tones with a patchy result

Hard Mix blend mode explained
- Extreme blend mode that saturates and flattens

Difference blend mode explained
- White pixels invert, grays darken, and black pixels don’t change

Exclusion blend mode explained
- Same as Difference but doesn’t darken grays

Subtract blend mode explained
- Light areas darken significantly, darker areas aren’t affected as much

Divide blend mode explained
- Opposite of Subtract: dark colors are lightened and light colors barely change

Hue blend mode explained
- Changes the hue but value and saturation remain the same
- Great for doing a paint-over to compare hues

Saturation blend mode explained
- Doesn’t touch value and hue of the base layer. It takes the lowest saturation of whichever layer has the lowest saturation

Color blend mode explained
- Takes hue and saturation of the blend layer and keeps the value of the base layer

Luminosity blend mode explained
- Keeps hue and saturation of base layer and takes value of blend layer
I lowered the opacity in the example below. This way you can see better what this blend mode does: change the value to the pixels of the blend mode!

All blend modes compared to each other
So here I compared all blend modes into one chart, based on all categories:

I hope this makes sense. (Not so) fun fact: putting all of this together took me literally hours :’)
When to use which blend mode?
There are no rules when it comes to blend modes. In fact, almost no one knows what each blend mode does. And it doesn’t matter if you don’t know!
All you need to do is:
- Create a layer above the layer you want to affect
- Paint whatever you want to paint
- Scroll through every single blend mode until you find something that you like
- Play with the opacity of each blend mode
I use blend modes every single time I paint in Procreate. I highly recommend you check them out.
Blend modes are great to use for:
- Light and shadow
- Think of sunrays, cast shadows
- I recommend Add for light and Multiply for shadows
- A cohesive color scheme
- Tie all of the colors together by using 1 flat color in a blend mode
- I recommend blend modes in the Lighten group for this
Most commonly used blend mode
Here are the most commonly used blend modes:
- Multiply
- Overlay
- Add
- Screen
Multiply is by far the most used one. Everyone uses it for shadows. Especially when doing characters!
This illustration has a light on the right side of her face which I did using an Add blend mode. In this illustration, I used a single color with a blend mode to give it a cohesive purple look. See how the skin has the perfect hue for the background?
But whatever looks good for your situation you should pick. Don’t think too much about the different categories. Just scroll and pick!
I hope this article helped you understand how to use blend modes in Procreate. If you have any questions feel free to leave them in the comment section below.
Sign up for my art letter if you’d like to receive articles like this in your mailbox once a month!
See you next time,
♡ Laura


